
Best Hosting for WordPress Convesio
Table of Contents Understanding Managed...


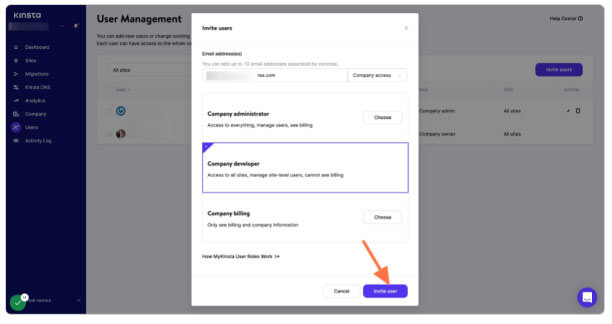
Table of Contents Understanding Managed...
In this very short tutorial, I'm going to show...

Search engines use spiders to index websites....
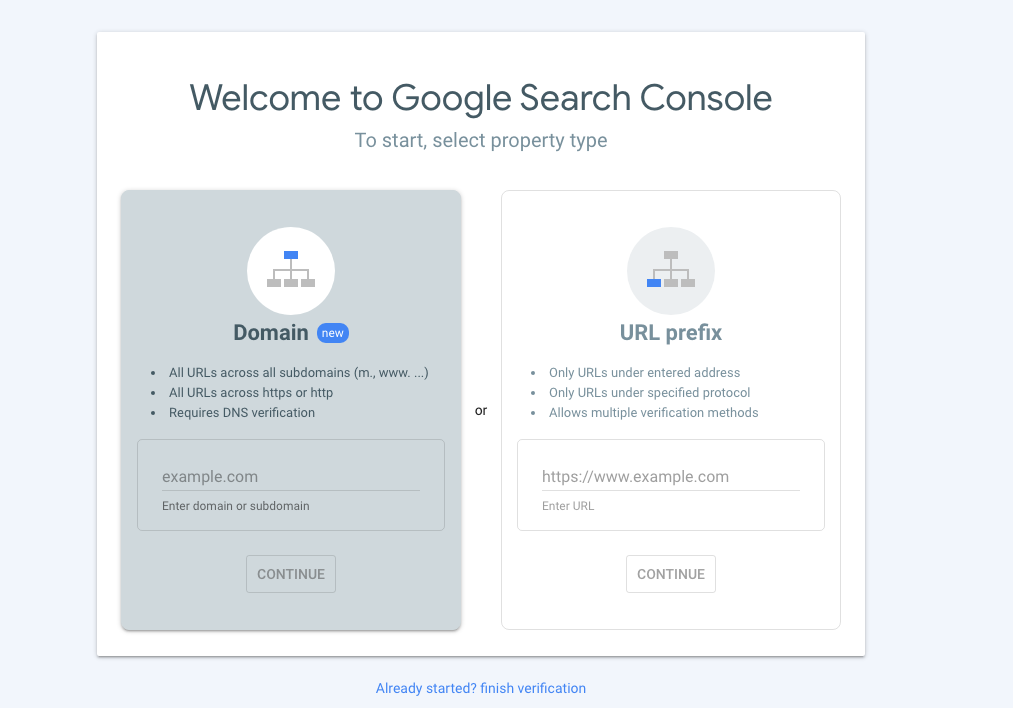
Google Search Console (GSC) is a free web tool...
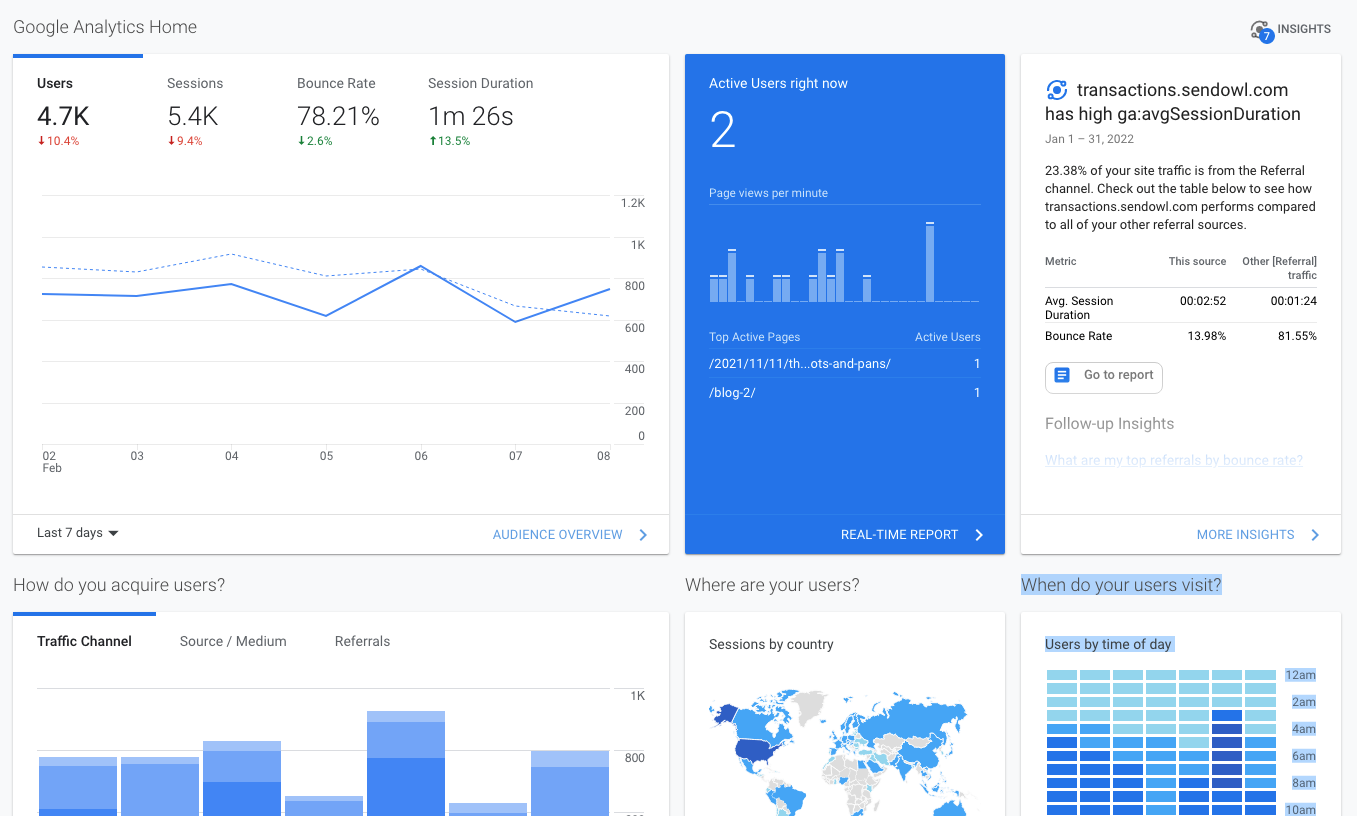
One of the most important aspects of owning a...

